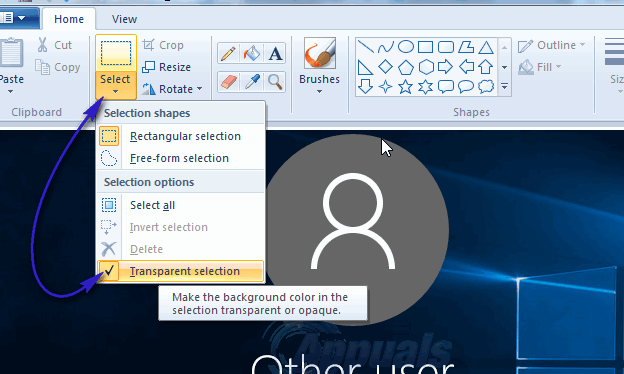
Many Paint users are confused with an option in Select tool under Image group on Paint’s Home tab. This is the Transparent Selection option that you can toggle on and off. Paint users select this option and hope that their saved image will have a transparent background. Unfortunately, this is not true. Transparent Selection option only works within the Paint application and it only works with the white background. To try this option, follow these steps. Click the small arrow on Select tool under Image group and check Transparent Selection
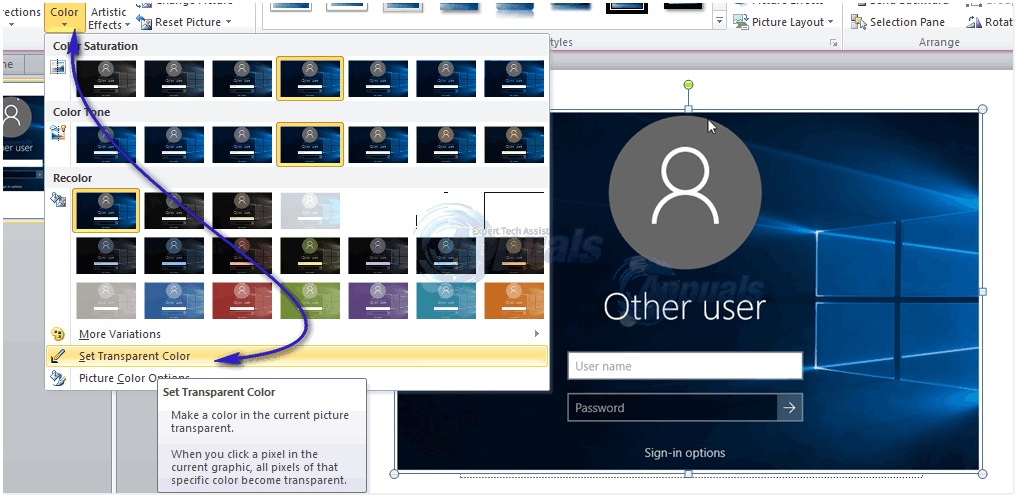
Now select an area of the image that contains a part of the image and a part of the white background. Copy and paste this selection to another area of the image. You will see that the white part of the selection is transparent. However, when you save the image, the white area of the image will not be transparent. Fortunately, there is a hack that you can use to have images with transparent backgrounds. However, you need Microsoft PowerPoint for this hack to work. If you have Microsoft PowerPoint installed, you are ready to go. Follow these steps to remove background color of your image. Insert your image into Microsoft PowerPoint. Select the image. In Picture Tools, go to Adjust group and click the Color Select Set Transparent Color. A color selection tool will be attached to your mouse cursor. Precisely click in your picture on the color you want to remove.
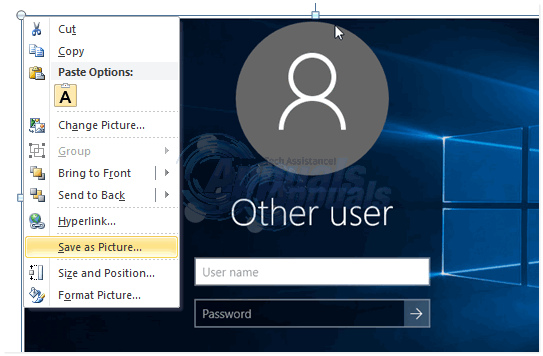
You will see the color being removed instantaneously. Right click the picture and click Save as picture.
Choose PNG from Save as type dropdown menu in the Save As Picture dialogue box. Note: If the background color is present in other areas of the picture, it will be removed as well. Your saved picture will have a transparent background.
How to Make Background Transparent by Default for New Images in GIMP?How to Make Taskbar Translucent or Fully Transparent in Windows 10How to Remove the Background of an Image in Paint 3DFix: Floating Transparent Box Above the Taskbar on Windows 11


